Install Contabo VPS from ISO

I recently rented a small storage VPS at Contabo. On my request (left as a comment during the order) it was provisioned in Munich, giving me a reasonable level of geo-redundancy against Nuremberg, where my other servers are hosted. The ~150 km between the two sites is already close to the BSI recommendation of 200 km for geo-redundant data centres — plenty for my needs.
To ensure data confidentiality I wanted to install a fully encrypted Debian 10. Interestingly, Contabo's customer panel does not let you attach ISO files — server reinstalls are only possible with the provider's pre-built images, which obviously don't bring full disk encryption and require a healthy amount of trust in the provider. Other providers (e.g. netcup or Hetzner) offer a large selection of ISOs and even allow you to upload and mount your own.
Contabo's support told me on request that ISO files can be mounted manually by support staff — at an extra cost of €25 per 15 minutes. That route was too cumbersome for me, too expensive (it's just mounting an ISO) and too slow (the answer took about 6 hours).
So I looked for an alternative — and found one: with grub you can boot ISO files directly from a disk. The ISO is fully loaded into RAM so that the desired system can then be installed on the very same disk from which we just loaded the ISO. The approach is not limited to Contabo; it works with any other VPS provider too.
Prerequisites
To follow the steps below you need:
- a link to the ISO file (in my case a Debian 10 netinst ISO)
- a pre-installed Linux server with GRUB 2 (in my case Debian 10)
- VNC access to the virtual server (we need to intervene in the boot process and use VNC for the installer)
My partitioning looks like this:
root@vmd7XXX2:~# df -h
Filesystem      Size  Used Avail Use% Mounted on
udev            2.0G     0  2.0G   0% /dev
tmpfs           395M  5.3M  390M   2% /run
/dev/sda2       294G  967M  278G   1% /
tmpfs           2.0G     0  2.0G   0% /dev/shm
tmpfs           5.0M     0  5.0M   0% /run/lock
tmpfs           2.0G     0  2.0G   0% /sys/fs/cgroup
/dev/sda1       922M   47M  812M   6% /boot
tmpfs           395M     0  395M   0% /run/user/0
Note that /boot is its own partition on /dev/sda1. We'll need to take that into account when writing paths later.
Step 1: Download the desired ISO on the server
As root we create a new folder /boot/iso inside the boot partition. The ISO to boot goes there. For Debian we also need the initrd.gz from the hd-media folder:
root@vmd7XXX2:~# mkdir -p /boot/iso && \
cd /boot/iso && \
wget https://cdimage.debian.org/debian-cd/current/amd64/iso-cd/debian-10.9.0-amd64-netinst.iso && \
wget https://mirrors.edge.kernel.org/debian/dists/stable/main/installer-amd64/current/images/hd-media/initrd.gz
Step 2: Adjust the GRUB configuration
Now we reference the two files in our GRUB configuration:
nano /etc/grub.d/40_customThe file starts with a few lines that we leave untouched. Below them we add these lines:
menuentry 'Debian Netinstall' {
    set isofile='/iso/debian-10.9.0-amd64-netinst.iso'
    set initrdfile='/iso/initrd.gz'
    loopback loop $isofile
    linux (loop)/install.amd/vmlinuz findiso=$isofile priority=low
    initrd $initrdfile
}
Important: because I have a dedicated boot partition mounted at /boot, I need to omit the /boot prefix — my paths start directly with /iso. Yours may differ depending on your partitioning.
The final file looks like this:
root@vmd7XXX2:~# cat /etc/grub.d/40_custom
#!/bin/sh
exec tail -n +3 $0
# This file provides an easy way to add custom menu entries.  Simply type the
# menu entries you want to add after this comment.  Be careful not to change
# the 'exec tail' line above.
menuentry ‘Debian Netinstall’ {
set isofile=’/iso/debian-10.9.0-amd64-netinst.iso’
set initrdfile=’/iso/initrd.gz'
loopback loop $isofile
linux (loop)/install.amd/vmlinuz findiso=$isofile priority=low
initrd $initrdfile
}
Now we have to let GRUB pick up the file and regenerate its configuration:
root@vmd7XXX2:~# update-grub
Generating grub configuration file ...
Found linux image: /boot/vmlinuz-4.19.0-16-amd64
Found initrd image: /boot/initrd.img-4.19.0-16-amd64
done
Step 3: Boot the ISO
After a reboot we can select the ISO in the boot menu via the VNC console (e.g. with KRDC) using the arrow keys:
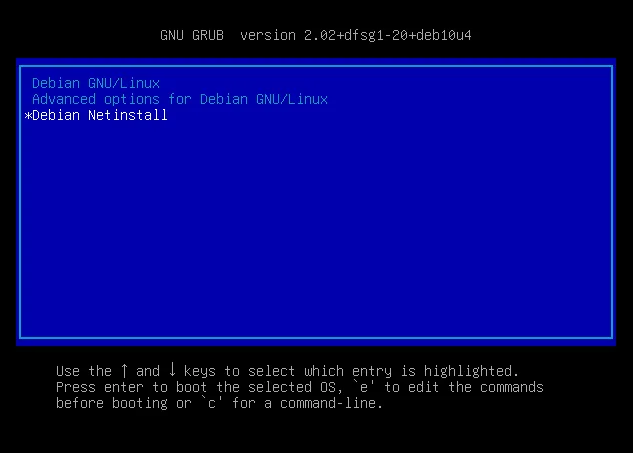
Confirm with Enter. The netinstall ISO boots and we land in the installer.
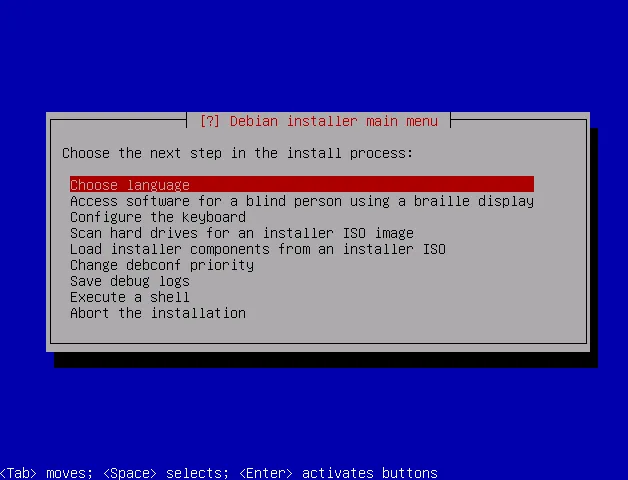
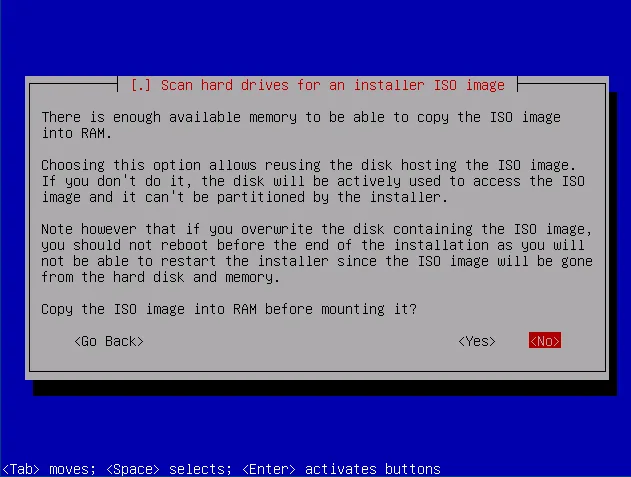
Pick the required entries (Choose language, Configure the keyboard, Scan hard drives for an installer ISO image). Confirm the dialogs with Enter until you can select the ISO file:
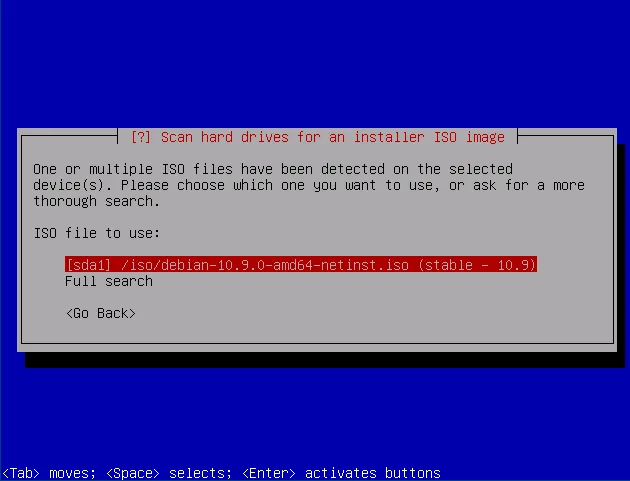
After selecting the ISO, choose Yes to load it into RAM. That lets us install to the very same disk afterwards.
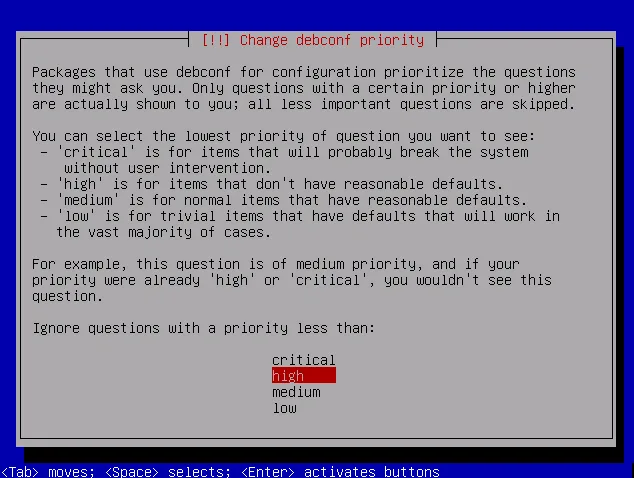
To switch to the normal installer flow, choose Change debconf priority in the installer menu, then high.
From this point on, the installation proceeds as usual. During partitioning you can select the disk the ISO was copied from and complete the installation normally.